Our Land Regeneration Project: Rewilding in Southeast Queensland
Explore our 6 Step FrameworkOur Place in the Moreton Bay Region
Located just 45 minutes from Brisbane city, our property sits in the heart of Southeast Queensland’s biodiverse but increasingly pressured landscape.
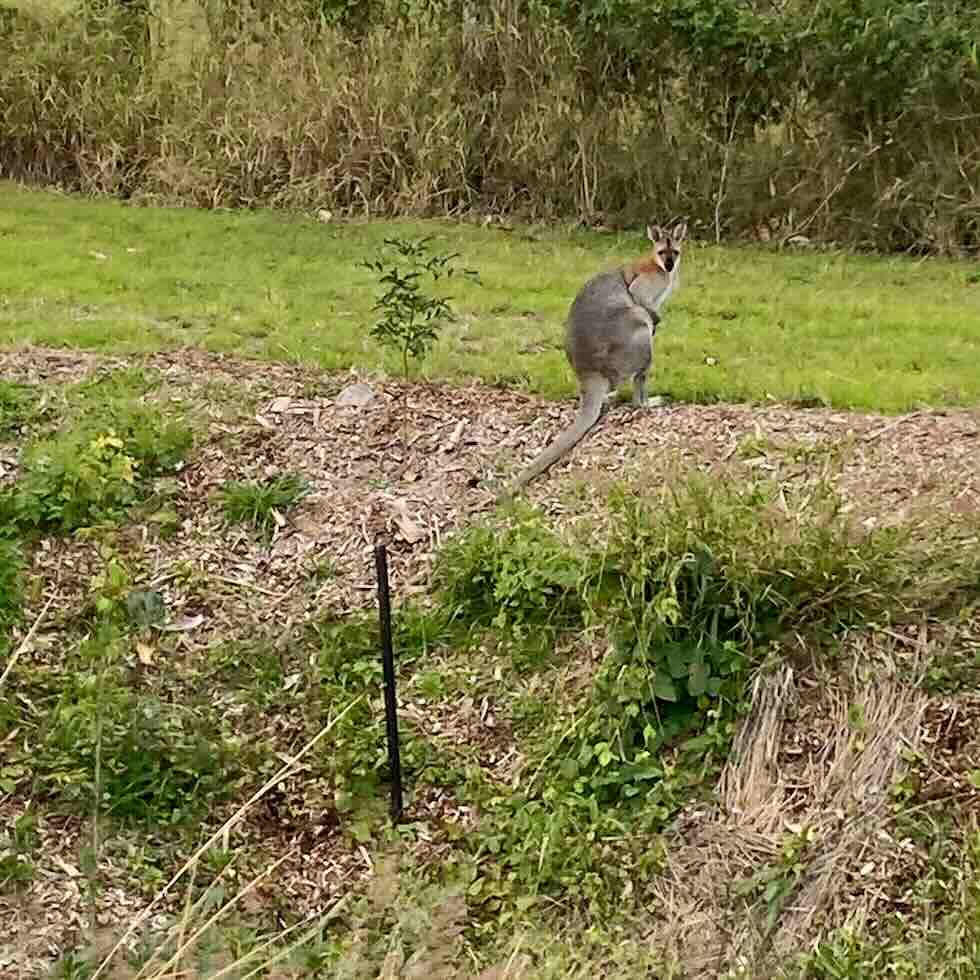
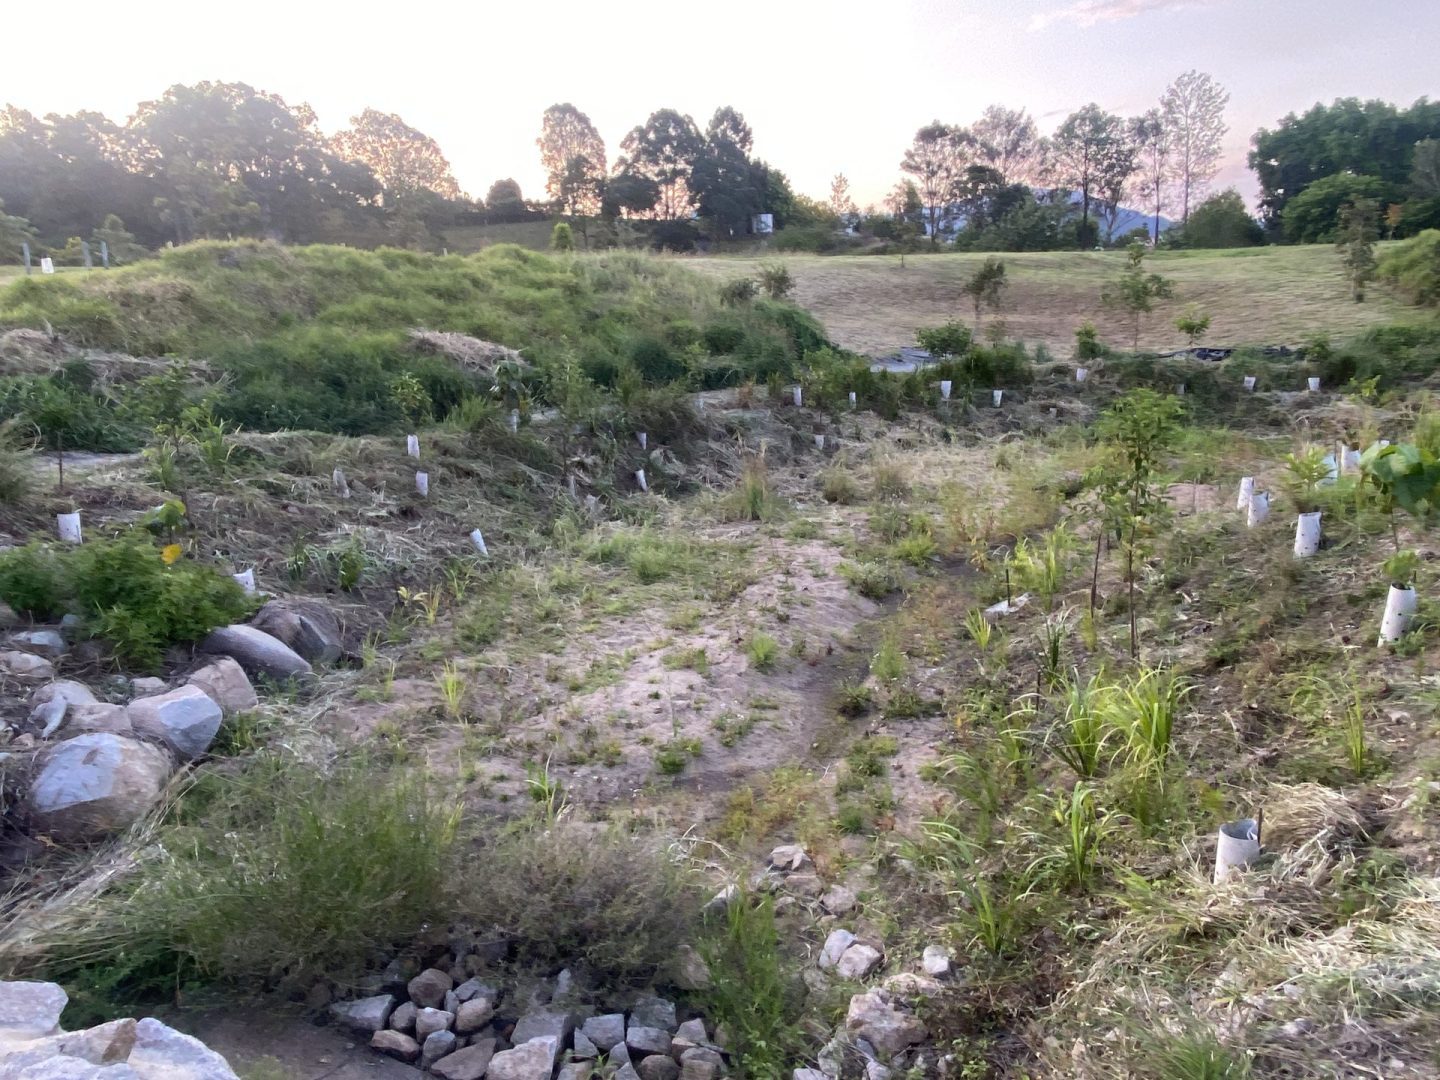
The land is approximately 5 acres in size, with two gullies which are dry gullies for the majority of the time, except in heavy rain when one of the gullies runs with water.
It also includes a steep hillside which will need regeneration.
When we first walked this land, it was both exciting and a little overwhelming. The potential was clear, but so was the work ahead.
Why We Started This Bushland Regeneration Project
Growing up immersed in the natural beauty of the bushland has shaped us deeply.
We learnt about the importance of natural areas for habitat for animals, as well as providing the essentials for our life on earth – water, soil, oxygen.
But we also learnt that it was more than this. We developed a deep understanding and respect for the beauty and complexity of natural ecosystems and the vital role they have – not only for the home that we call our planet, but also the human wellbeing it supports.
The loss of natural forests is immensely concerning and a call to action for all of us to halt their decline. We have all seen the impacts of the loss of natural landscapes and habitats, whether in our local area or through large-scale clearing.
This loss is attributed to a variety of reasons such as urbanisation, industry impacts such as beef production, and natural disasters such as fires and floods.
We decided that we would do what we could to contribute to not just halting the decline, but make a tangible contribution to reforesting a patch of land, no matter the size. When we found our place, we knew we could contribute to making a small yet positive difference.
We are in the early stages of this work. We are no experts in doing this, and are learning bit by bit how to listen, restore and regenerate the land we call home.
We welcome you to follow our journey, download resources which can help you on your own land restoration project, and even join our Rewilding Community.
Our Approach To Bush Regeneration and Rewilding
The principles of bush regeneration are guiding our approach to this project. Rather than simply going in and planting trees, bush regeneration works with the land’s own intelligence.
The Australian Association of Bush Regenerators (AABR) defines bush regeneration as “the rehabilitation of bush from a weed affected or otherwise degraded area to a healthier community of native plants and animals.”
There are so many rich bodies of work to draw upon to guide bush regeneration, from the Bradley Sister’s pioneering bush regeneration work in Sydney to the Miyawiki method.
Importantly we focus on protecting what’s naturally emerging, create the conditions for the bush to regenerate itself and remove what doesn’t belong there.
At first the process of regenerating our 5 acres of land seemed overwhelming, so we called in some help. We connected with our local native plants nursery, as well as our local Council and sought the help of a local bush regenerator.
We have found that importantly the process teaches us to stop, listen and observe before jumping in too quickly to solutions – an antidote to the ‘busyness’ of our modern day lives.
Not sure where to start with rewilding your own land?
- Check out our resources
- Share your own journey to inspire others! Please let us know what steps you have taken in your own rewilding project on our Facebook or Instagram pages, or by joining the Rewilding Community by clicking on the icons below.
Our 6-Step Land Regeneration and Rewilding Framework
Here, we document the steps we’ve taken so far in our land regeneration process.
Through our own experience, and with guidance from local experts, we’ve developed this into a practical framework for approaching land regeneration. We share it here as a useful starting point that you can adapt to your own patch of land, noting that every piece of land is different, and your own journey will be unique, guided by listening and observing your own patch.
Step One: Get to know the land
Walking, observing and listening. Understanding the land and its history.
Observing and becoming attuned to the rhythms of your land is an essential first step to any regeneration project. It’s tempting to jump straight into action, but the information you gather through patient observation will inform every decision that follows.
Observing the following can be helpful:

The topography of the site. Walk the boundaries and all around your site so you gain a deep understanding of the land including the gradient of the site, slopes, levels, soil types and transitional areas.
The direction and flow of water across the site, including where water might be stored, and where it drains or runs off
The location of onsite and adjacent structures, including any existing fencing, sheds, water sources, or buildings that might affect your planning
Direction of wind, particularly in storms and cooling breezes
Movement of sun, light and warmth across the site
Existing plant species, the amount of them on the site, their location and age
Rock, top soil and sub-soil and landform patterns

Tip: This observation phase takes time, ideally across different seasons and weather conditions. But it’s time well spent. The land will tell you what it needs if you’re willing to listen.
Step Two: Mapping the land
No site is the same, and each part of the sites are different.
Obtaining maps of the land from your local Council or Nursery can be very helpful.
Whilst our land was not eligible for the Land for Wildlife scheme, the local officer was extremely helpful in obtaining the following maps:
A topographical map of ‘Pre-clearing Regional Ecosystems coloured by Broad Vegetation Groups.’ This map gave us some insights into the type of ecosystems that were present on our land prior to broad-scale clearing.
A ‘Remnant Regional Ecosystems coloured by Broad Vegetation Groups’ map. This was also helpful in understanding the types and amount of ecosystems that remained in our area.
A Vegetation Management Report which had a number of other layers of mapping of our site in the report including ‘Regulated Vegetation Management Map’, ‘Protected Plants Flora Survey Map’, ‘Koala priority area, koala habitat area and identified koala broad-hectare area map’ and ‘Koala Habitat Regional Ecosystems for Core Koala Habitat Areas.’
Drawing a map of the site is a helpful starting point, and breaking the site into smaller zones can help you start to understand the different areas within your site.
Each aspect of the land will have different needs, strengths and opportunities. By mapping out zones on the land, you can start to understand the different characteristics of each zone, their needs and also become attuned to the possibilities for that zone.
The mapping process and identification of zones can be used as a prioritisation tool. Once you have identified the various zones and their respective characteristics, you can use this to guide your decision making on:
Sequencing of work and effort in different zones
Understanding which zones need to be prioritised first because of flow-on effects. For example, identifying areas where weeding, clearing or installation of infrastructure such as fences is required before planting can proceed
Zones you want to profile strongly and thereby put more time, money and effort into
For us, we worked with a local bush regenerator to map out a number of different zones which were characterised by the following:
Type of soil
Existing plants
Movement of water, sun and wind
Level of degradation
Natural features which lent itself to new possibilities and opportunities
Our vision of the site
Once we completed the mapping process, a vision for the possibilities and opportunities of the site can start to emerge.
Tip: This process of mapping can help to break down a task which may seem overwhelming to start with into manageable, small steps. Your local Council, native plant nursery, or a bush regenerator can be excellent sources of maps and mapping support. We’d encourage you to reach out early.
Step Three: Creating a vision for each zone
Once we have mapped out our zones, we can start to create a vision for each one.
Give yourself time to mull over questions on what could be possible for this zone such as:
What inspires us here? What lifts our spirits?
What are the natural features of this area which we can optimise and enhance?
How do the elements affect this zone eg how does water flow across this zone? Where is the wind and breeze direction? What are the patterns of sunlight and shadow?
Are there trees and plant species which are native to this area which would suit this part of the site well?
How can the planting of native species potentially integrate with other features such as hard landscaping?
What mixtures of plant species would work for complementary or contrasting purposes? How might they fuse together?
Tip: You may want to capture your vision through words, art, drawings, sketches or collation of images which inspire you for this zone. Placing the vision somewhere you will look at each day will continue to provide inspiration and ideas to you as the vision is refined.
Step Four: Creating a plan and prioritisation for each zone
With your zones mapped and your vision developed, you can start creating a working plan for each area.
The plan for each zone can include the following:
Overview of your vision for the zone
Sketch of what the zone will look like once completed. It can be as rough or as detailed as you like
Soil type
Notes on direction and impact of the elements ie sun, wind and water movement
List of plant species and where you will plant them
Tips on finding your plant species list:
We were able to obtain a good plant species list from our local Council. Here is an example of a species list by the Moreton Bay Regional Council.
The State Government’s Environment Department may also hold details about the Regional Ecosystem which can help guide your planting of endemic species. An example of the Queensland Government Regional Ecosystem resources can be found here.
Your local community nursery will also be a great resource for you. Ours provided us with a species list and is our go-to place for re-stocking of native plants as we need them.
Prioritise your zones
We ordered and prioritised which zones we needed and wanted to get started on. This was also aligned to our vision for each zone, and timeframes for completing the work. Some of the things which informed our decision were:
Urgency of rehabilitation, for example are there areas that are badly degraded? Are there areas where erosion is occurring or areas requiring stabilisation? Are there areas where native plants are being strangled and dying because of weeds?
Timeframe for the establishment of the plants, for example planting trees which take a long time to mature early on.
Planting pioneer species. These help to fix nitrogen into the soil and create the necessary healthy conditions for other plants to thrive. An example of this at our place is where we focused on planting mature trees along the gullies and waiting until they were established before planting mid-canopy and grasses underneath and around them.
Water needs. Consider the water needs for plants and trees, particularly in the establishment phase. Hydrozoning can help guide your thinking.
Budget. Consider the work needed for each zone and the budget for weed removal, installing infrastructure such as irrigation lines, landscaping, plant and trees and supporting material such as tree guards.
Timeframes. Once you begin working on an area, it’s important to consider that once an area is disturbed, especially if there are a lot of weeds, quick successive planting is required to help manage weed re-growth. For us as we got into the rehabilitation of the work, it became apparent that some of our timeframes were not realistic as some zones needed a lot more work and resources than first anticipated.
Tip: Having a rough plan is helpful but shouldn’t be overly prescriptive or constrain the creativity and innovation that emerges as you start to undertake the work on different zones. Keep in mind also that once work commences on areas, it is a long process and sometimes can be years before you start to see signs of new improvement.
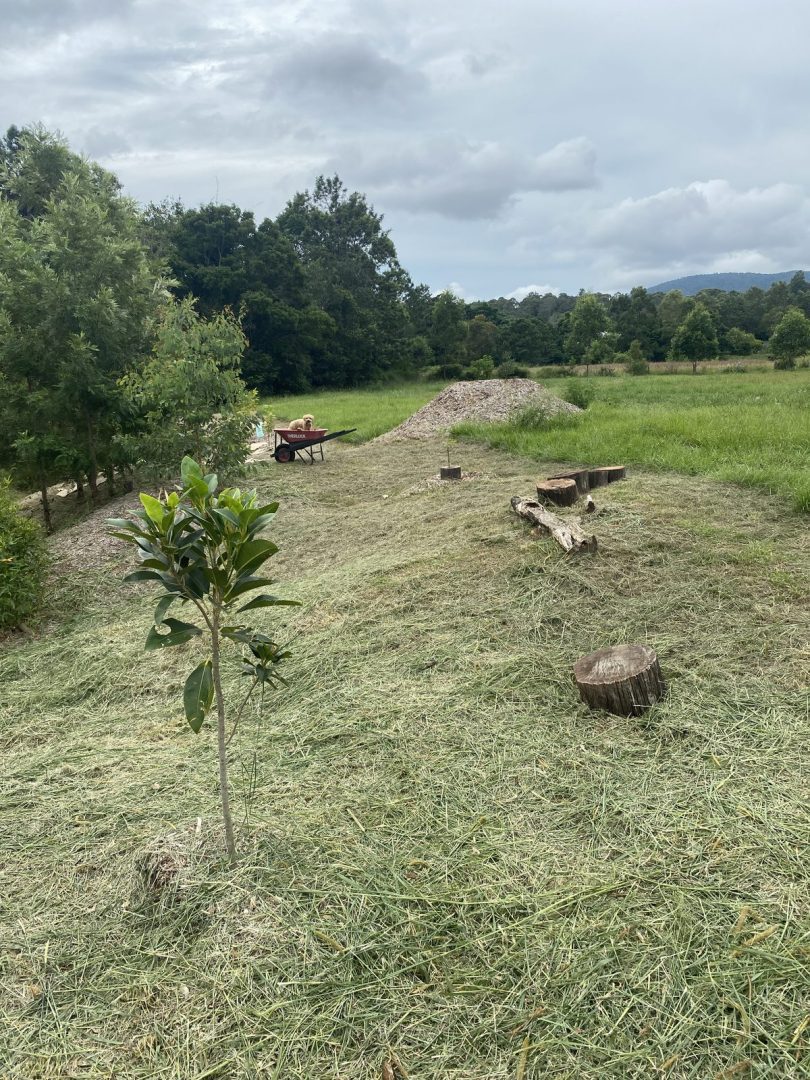
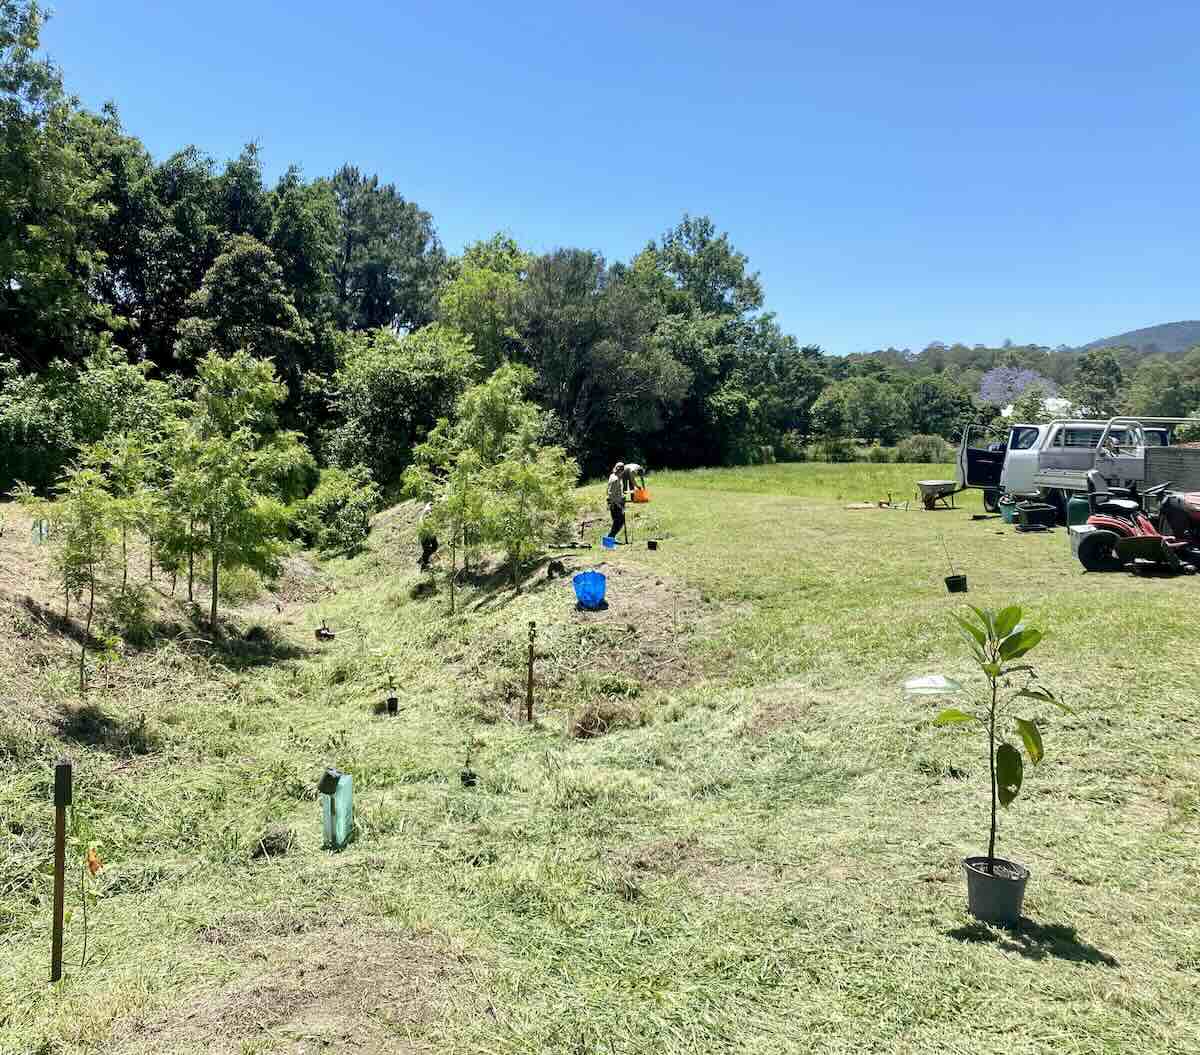
Step Five: Start your regenerative work
Now that you have a birds-eye view of your land, your zones and what you want to achieve, the work on regeneration and rehabilitation can start.
This will look different for different areas and can include:
Eradicating weeds
Removing or installing necessary infrastructure such as fences to keep cattle out
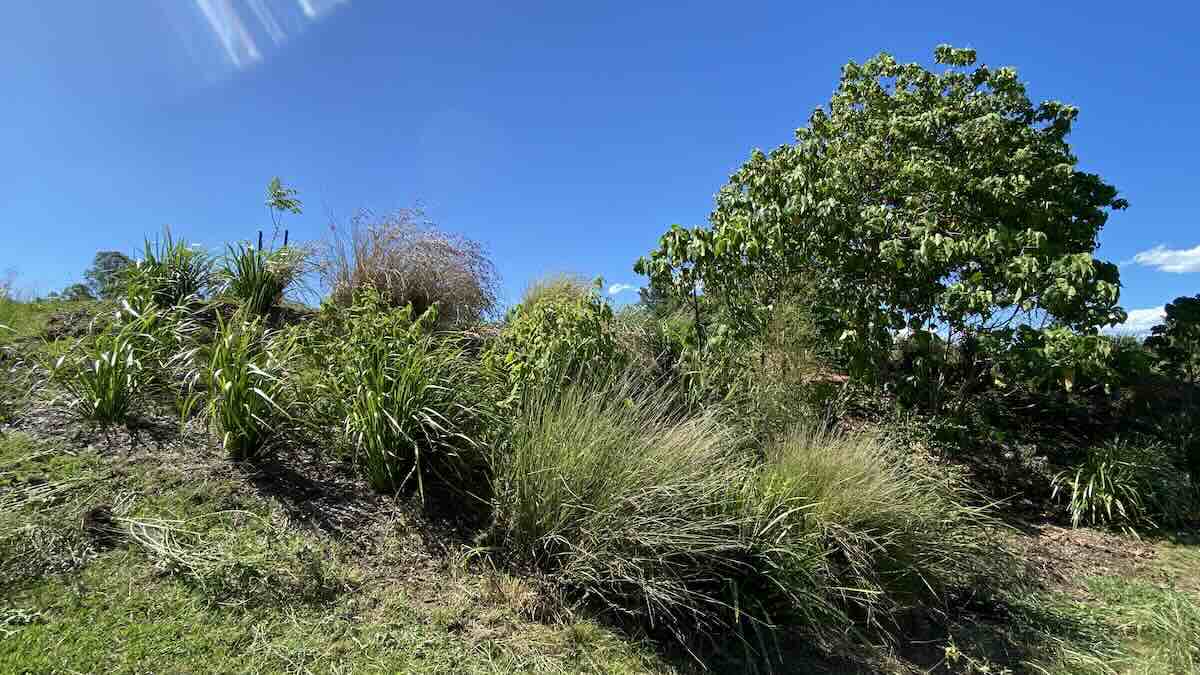
Planting! This can vary depending on your working plan for each zone and can include planting:
Canopy level ie large trees
Mid-storey level
Ground level: sedges, grasses and rushes
For us, this is an iterative and ongoing process. The work is never complete!
Tip: Initial plantings may need to be added to over time. Plantings can also occur in stages such as fixing nitrogen into the soil initially, and then later adding different species.
Step Six: Pay attention to feedback
Continue to listen, observe and attune to nature.
As the regeneration work happens, it is important to be mindful that it may (and likely will!) change and evolve. The plan you have for each zone is just a starting point. What is more important is that you listen, observe, learn and stay connected to the land as you do the work and respond accordingly. Something that felt right initially may no longer be the case, and things that you thought would be successful such as particular plants in a location may not work as planned. Flexibility and adjustment based on listening to nature is key to your success.
If you are open to the feedback nature provides, you can adjust and adapt your regenerative work so that it can really thrive!
Land Regeneration Resources That Have Helped Us
We didn’t start this journey alone, and you don’t have to either. These are some of the organisations and resources we’ve found genuinely useful:
Landcare Australia — Community-based landcare and conservation
Land for Wildlife, Southeast Queensland — Habitat support for private landholders in SE QLD
We also recommend visiting your local council’s website for maps and other resources.
Keep an eye out on our full Resources page as we publish SE QLD plant guides, planning templates, and other helpful links.